The Slideshow Widget is a tool you can copy and paste into any page of your website to display a photo slideshow of selected properties. To create a slideshow widget, click Design in the main menu, Website in the submenu, then Widgets. From there, click Create New in the upper-right hand corner.

Select Type of Widget
Choose Slideshow from the drop-down menu.
Choose Properties to Feature
Use the drop-down menu to choose which property set to display in your slideshow, then click Save Changes. The next steps you will take will depend on which property set you choose. Below is an explanation of each option:
- Featured Properties - Any active listing associated with your Agent ID or Office ID (if subscribed to an Office Account). This property set will match the listings showing up under the Listings -> Active tab in your control panel.
- Supplemental Properties - Any listing that has been manually added to your account in the Listings -> Supplemental area of your control panel. Supplemental listings are listings that are not included in the data we receive from your MLS.
- Featured + Supplemental - This property set includes all MLS listings associated with your agent or office ID and any supplemental listings you have added to your account.
-
Featured Agent(s) Properties - This option will include only the currently active listings of one (or a selection) of the agents in your Office account (an Office level account is necessary for this option).

- Sold/Pending Properties - Any sold or pending listings stored in your account. This property set matches listings found in the Listings -> Sold/Pending area of your control panel. This can include your archived featured listings, or supplemental listings.
- Custom Search - Choose this option to create a slideshow based on search criteria. This option can come in handy if you would like to create a slideshow for a neighborhood, subdivision, or area. You can use any search criteria available from your MLS.
-
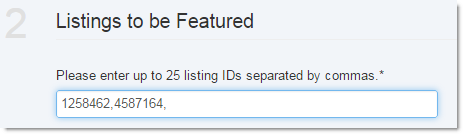
Custom List - Build your property set using a list of MLS ID numbers. This option is great if you would like to display very specific set of properties. Simply enter in the MLS ID numbers for the properties you would like to display in the slideshow.
- Polygon Search - The polygon search option is useful if you would like to include listings in a very specific area that maybe your MLS doesn't have accurate enough results for using search criteria alone. Using the polygon tool you can draw a shape on a map outlining just the area of listings you want to include. See this article for more information about how to use the Polygon Tool (start on Step 2).
- Build (Copy & Paste) Link - This option allows you to take prebuilt search pages and just paste the link to essentially make a copy of a saved link search results in widget format. Check out this article concerning the Build Link option.
Name your widget and set preferences
Enter a name for your widget in the box provided. You can also set the sorting order of the slideshow, the slideshow width and height in pixels.
Fade in Time is how long the transition between listings will fade.
Time Between Props is how long a single listing will be shown before the slideshow fades in the next listing.
Caption Opacity determines the transparency of the background behind the listing information. This is not the image of the property, just the solid color background behind the text.
Caption Height is how high that solid color behind the text will appear when it slides up on each listing in the slideshow.
Caption Behavior lets you specify whether you want the listing information in the caption to be visible all the time or only "on Hover". If you choose "on Hover", then the slideshow will just show images of listings and no information about price or address until the visitor puts their mouse over the image.
If you need to guess about some of these settings you can always come back to the widget and edit it in order to fine-tune them.

When you have finished building the widget and choosing the settings click Build Widget.
Editing the Widget
After creating this widget, you will be able to edit it and even change the search string by hand to allow for more granular customization.

Embedding the Widget
The last step on this screen will display your widget code. Simply copy the code displayed here, and paste it into the HTML of the webpage where you would like it to appear.
NOTE: If you do not know how to access the HTML in your website or are unsure where to place the Slideshow code within the HTML, please contact your website designer or the support team of the company who is providing you with the tools to edit your website for further assistance.
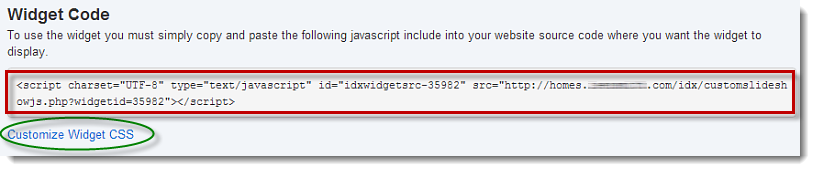
You can also add Custom CSS to this widget using the Custom Widget CSS section.
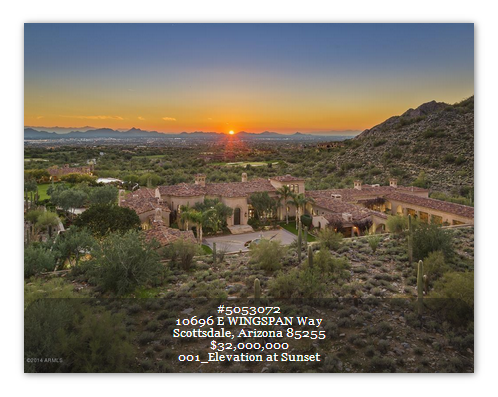
Once you have placed the widget embed code into your website and published the changes you will be able to see your new Slideshow immediately.
A note about multiple instances: As with all widgets, if you intend to use this widget in more than one location on your website (for instance both in the sidebar and in the main body) you should create a second widget of the same type for the secondary location. Using the same widget instance more than once on the same page can cause display errors.