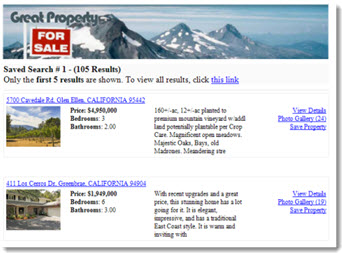
You can provide your customers with automatic Email Updates regarding listings of interest to them. Any Saved Search or Property in their account, whether they saved it themselves or you saved it for them, will be regularly updated and sent out via email to them. Email Updates for Saved Searches will include newly listed properties that match the criteria of the Saved Search. Email Updates for Saved Properties will be sent any time any change is made to any of that listing's "Core Fields" i.e. Price, Status, Description, SqFt, Address, Beds, or Baths.
These Email Updates have a standard look and some default settings, all of which can be customized. Below are instructions for customization, starting with your basic settings:
General Email Update Settings
You can find your basic Email Update settings in the Control Panel under Design -> Settings -> Global. From here click on the tab for Email Settings.

Subject Line
Here you can customize the subject line of the property Email Updates that go out to your leads. The default subject line is already on the right. Select "Custom" and enter in your own subject line in the box provided.
Reply-to Address
Adding your email address to the Send Replies to Property Update Emails to section is optional, but provides an easier way for your clients to contact you. This is the email address to which your Lead can reply, allowing an easier interaction between you and your lead. If you leave this blank, clients will not have an option to reply to these email updates.
Receive Copies of Property Update Emails
You can receive copies of all the Email Updates that go out to your leads. There are two options for the type of copies you can receive. Selecting Copy of Each Property Update Email will send a duplicate email to you for every Email Update sent to each of your leads. Selecting 1 Summary of All Property Emails compiles a single weekly email that summarizes all the Email Updates your leads received. This option can cut down on the number of emails you receive if you have a significant number of leads getting Email Updates. You can also choose Do Not Send Copy which will mean you are sent no copies of any of the Email Updates sent to your leads. You can check on the updates that are sent to a lead by reviewing the Lead Record in the Manage Leads section of the Control Panel.
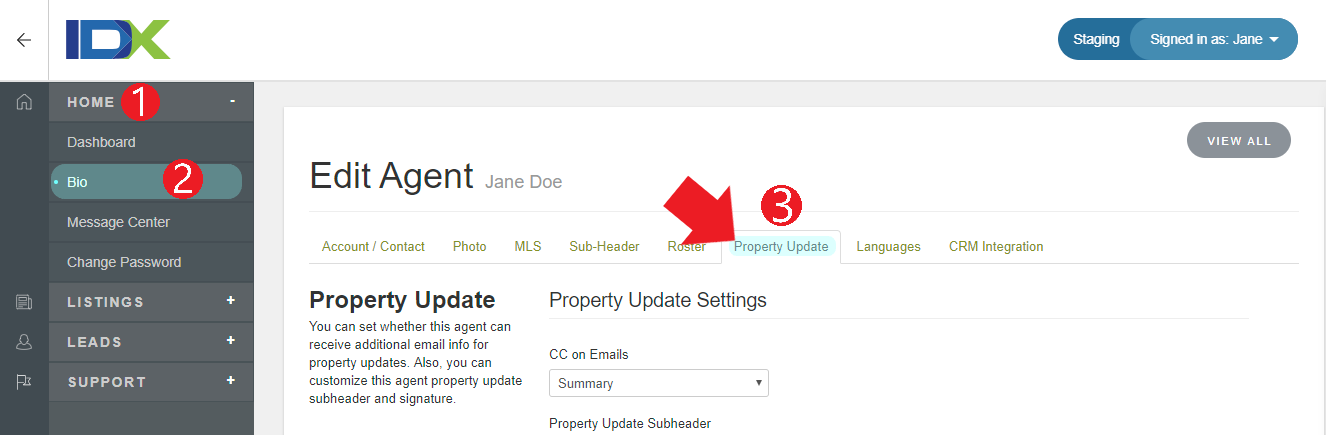
Options for Agents on Office Accounts
On Office accounts, agents will see many of these same options and be able to set up email updates to their own leads. Agents may also CC themselves on emails sent to their leads. This setting is available for Agents in their Agent Control Panel under Bio -> Property Update.
Email Updates Appearance Customization
You can also customize the appearance of email updates by using a Page Wrapper and/or a Sub-header.
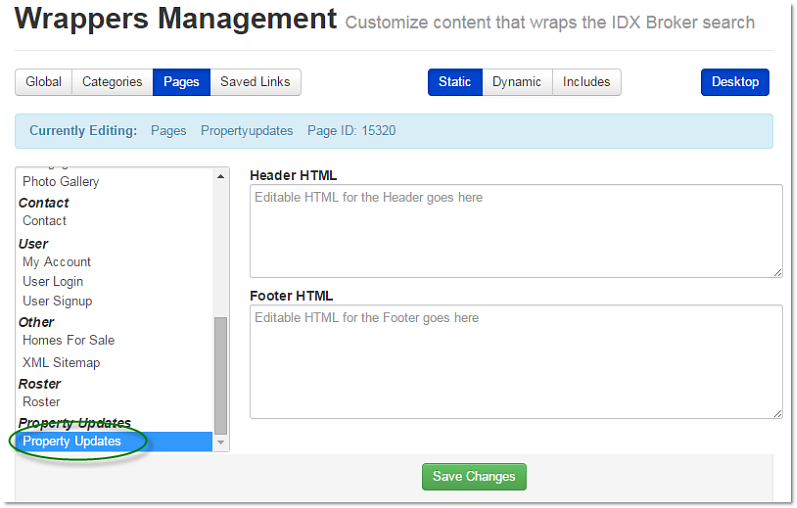
Email updates DO NOT pull the design from your Global Wrapper. If you would like your email updates to display a custom design or stationary along with the IDX content, you will need to create a separate email specific HTML wrapper for the updates that are sent out on your behalf. In order to customize and preview what your email updates will look like, go to Design -> Website -> Wrappers, and create a Page Wrapper for Property Updates. For more information on working with Page Wrappers, please see this article.
To add a Sub-header, go to Design -> Website -> Sub-headers, and choose the Page Sub-header for Property Updates.

Enter in your sub-header content using the content editor provided. You can add custom text, or even a custom banner to display at the top of your email updates. Note: You cannot upload any sub-header images into your IDX control panel. Instead, use an image hosting service or host the image on your own website and link to it in IDX.
Email Updates Signature & Contact Information
The contact information in the footer of your email update is pulled from the information you have entered in the Account -> Details section of your control panel. Please check to be sure this information is up to date and accurate.
Upon receipt of these email updates, leads will be able to click on the properties to view the results without logging in. If they would like to change any of their account information, including adding new searches, they will be prompted to log in.