IDX Broker's Listing Manager tool gives you and your leads the ability to save custom searches and receive email updates about any new listings arriving on the market that match the saved search. While your leads can manage and create their own saved searches and properties, there may be times when you want to add additional searches for them. Saving searches for your clients demonstrates the value of working with a real estate professional who is knowledgeable and can provide accurate and timely listing data.
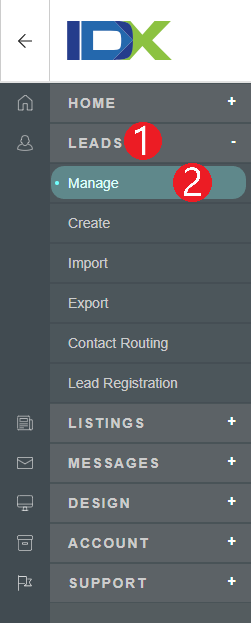
To get started saving searches for your leads click on Leads and Manage.
All of your leads are stored here. You can see which leads already have saved searches by viewing the column labeled S (short for Saved Search). To view the details of a lead's Saved Searches, you can click on the number displayed in the S column, or click the Lead Info icon under the Tools column and then clicking the Saved Searches tab.
Adding a New Saved Search
To add a new saved search or edit an existing one, click the Add/Edit Saved Searches button at the bottom of the screen.
Here, you will see all of the lead's Saved Searches in a table. To add a new saved search to this list, click the Add Saved Search link above the top right corner of the table.

Step 1 - Pick a search page
Choose which type of IDX Search page you would like to use to build this Saved Search. You can choose any IDX Search Page you have created in your IDX Page Links. Once you have selected the search form you would like to use, click Next Step.
Step 2 - Select your criteria
Your search form will display in this step. Using the fields provided, fill out the search form with your criteria. If you would like to get an idea of what your results will look like before you save you search, click View Results in New Window. A new browser window or tab will display your search results. When you are happy with the search criteria you have selected, click Next Step.

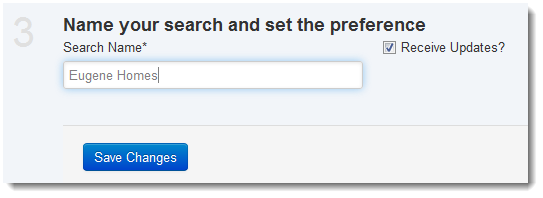
Step 3 - Name your search and set the preferences
Enter in a name for the saved search, and leave the Receive Updates? box checked if you would like the lead to receive email updates for new listings matching this saved search. Finally, click Save Changes to create your new saved search in this lead's account!
Edit an Existing Saved Search
To edit an existing saved search, click the Edit icon under the Tools column for the saved search you would like to edit.
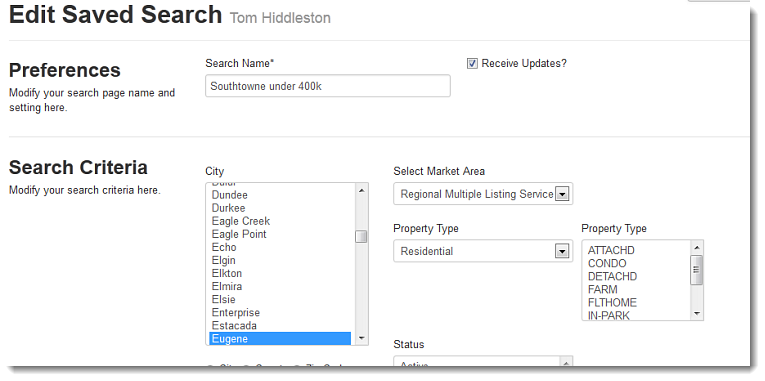
On the Edit Saved Search screen you can rename the search or change any of the search criteria. Make any changes you would like here and click Save Changes at the bottom of the page.
NOTE: Changes won't be obvious until you refresh the lead management page.
Managing Saved Searches
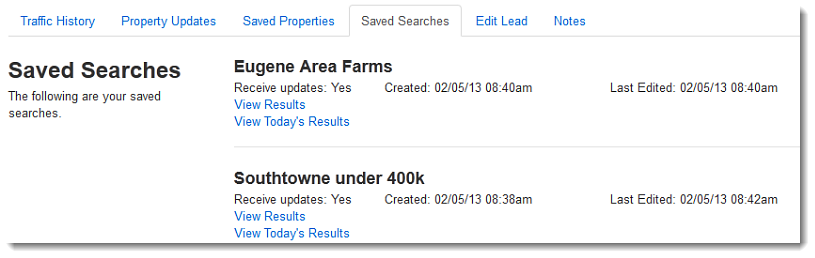
You can use the tools provided in the Saved Searches table to further manage your lead's searches. Under the Tools column, use the Preview icon to quickly view the details of the saved search in a pop-up window. Saved search details include the saved search name, URL, search criteria, and email updates preferences. There are also links you can use to view all search results in a new browser window or tab, or just view today's results.
Use the Trash icon under the Tools column to delete a saved search.
You can also delete saved searches in batches by using the checkboxes to the left of each saved search, and then clicking the Delete link at the bottom of the screen.

Sorting and Finding Saved Searches
You can sort your saved searches by clicking any of the column headings to sort by that column.

If your lead has a lot of Saved Searches, you can find a particular search by using the Search box provided above the top right corner of the saved searches table. Once you type something into this box, the table will automatically update to display only saved searches containing the search term you specified.
