Wrappers are the tools in your account that match your IDX pages to the look and layout of the rest of your website. The IDX Broker data lives on our servers and is served up raw until we "wrap" it to blend with the rest of your site. One wrapper option available to you is the CURL method which uses Include files. You can use server side include files to create the wrapper on your IDX pages.
The most obvious advantage to "Header" and "Footer" include files is that they are hosted locally with the rest of your website files, removing the need to log into the IDX Control Panel to update. You can also incorporate server side pre-processing or scripting (PHP or ASP) which would not otherwise function in the Static Wrapper method hosted on our servers.
All wrappers are accessible in your IDX account under Design -> Website -> Wrappers.

Step 1 - Create your include files
Create an empty page template on your website and split it into two halves at the point where the main content starts. This is the point where the IDX content will be injected. Put each half into it's own document and save them with the rest of your website files.
Your HTML or PHP file will need to produce HTML URLs that are absolute, not relative links. All calls to any files, including javascript and CSS files need to be absolute URLs.
The server-side script (ASP/PHP/ETC) that created the original HTML displayed in the static wrapper can be stripped from a single PHP/ASP file and used in separate header/footer files. These might be called header.php and footer.php for instance, and would be hosted on your server. The challenge is getting these files so that they work seamlessly both with IDX Broker content and your primary website content.
PHP uses the "include" command to call one file's server-side script into another. You will need to add an include command and call these header and footer files into your primary website so that anybody browsing the site would not know that you are pulling several files together in order to render one HTML page. You can learn more about the include command here.
Step 2 - Save in the Control Panel
Once you have created your include files, the next step is to add the URLs for those files to your IDX control panel.
In the IDX Control Panel go to Design -> Website -> Wrappers. Choose which wrapper you would like to apply (Global, Categories, Pages, or Saved Links) and choose Includes as the type of wrapper.
For more information about the Global Wrapper see this article.
For more information about Category, Page, and Saved Link wrappers see this article.
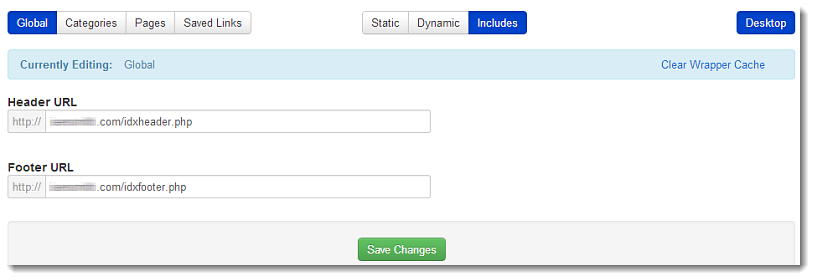
Enter the URLs to your header and footer documents and click Save Changes and you're done! View one of your IDX Page Links to see your new wrapper in action.