This article will help you install our WordPress plugin which brings powerful IDX tools into your WordPress site -IMPress for IDX Broker plugin.
Add the Plugin
This can be found at the above link, or in the WordPress Plugins repository. Login to WordPress and select Plugins in your dashboard. Then click Add New.

Search for "IDX Broker" and look for "IMpress for IDX Broker Wordpress Plugin". Click Install Now.

After you install the plugin make sure to Activate it.
Congrats, it’s installed! You should now see IMpress in your Dashboard with the IDX logo. The last step is to connect the plugin to your IDX Broker account.
Connect the Plugin to Your IDX Broker Account
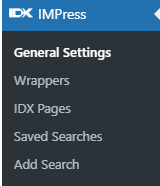
In your WordPress dashboard click on IMPress and General Settings.
In another browser tab, login to your IDX Broker account. In your IDX Broker account, click on Home and Access Control. In the green box you will see your IDX Broker API key.
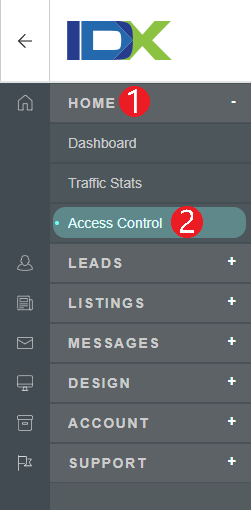
Click anywhere in the green box to copy your API key. Go back to the browser tab with your WordPress account.

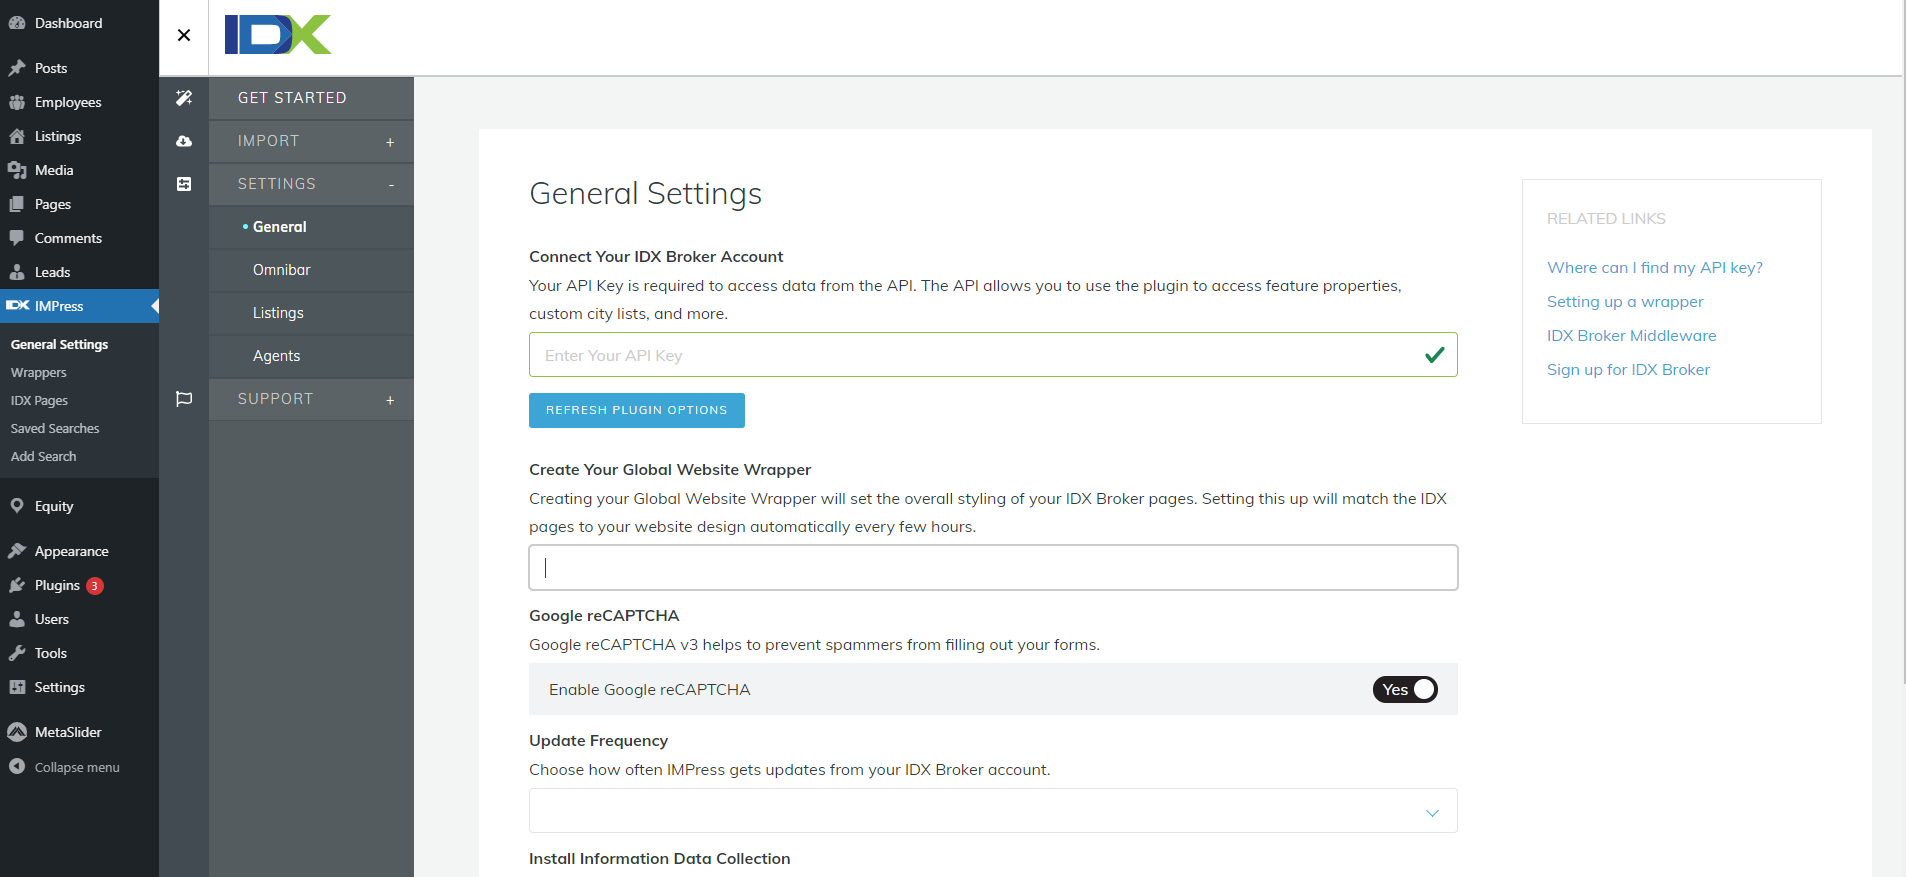
In General Setting you should see a field that says Enter Your API Key. Paste your API key here. Click Refresh Plugin Options.
Now your IDX Broker account is connected to your WordPress site. Nice job!
Considerations
The latest versions of the IMpress plugin do not support versions of PHP lower than 5.6. Please check with your webhost to upgrade your PHP if you encounter issues. You can also check these links for some popular hosting services.
DreamHost
GoDaddy
BlueHost
Hostgator