If your site is powered by WordPress and you’re using our IMPress for IDX Broker plugin, you can make use of shortcodes to embed a search bar, show listing information and add other functionality on any of your pages. On this page you’ll find a list of example shortcodes and screenshots you can use as a starting point for your site.
A shortcode is a short piece of text surrounded by square brackets that you can add with your page builder to enhance your pages. Typically you will have to choose a shortcode “block” or “widget” with your editor to add shortcode to your site; if you are unsure on how to do this with your page builder, you will want to consider either giving us a call or reaching out to your page builder’s support for assistance. Before using any of these shortcodes, make sure that you've already installed and setup the IMPress for IDX Broker WordPress plugin with your site by following the steps in our "Installing the WordPress Plugin" article.
And finally, you can modify any of the following shortcode examples to change their functionality. This is different for each shortcode widget, so make sure to carefully read what option each does and how they are set.
Use any of the links below to jump to a specific type of shortcode, or scroll down and read through the article to build a thorough understanding of what is possible with our WordPress widgets!
Search Shortcodes
Omnibar (Search Bar) Shortcode

The Omnibar is a general purpose search bar that would make a great addition to your frontpage or the sidebar for your site; place it where you want your users to be able to search via city, county, postal code and other options.
[idx-omnibar styles="1" extra="0" min_price="0"]
Start editing your page and copy and paste the above code into a shortcode block to easily add the search bar to your site. “styles,” “extra” and “min_price” are attributes that you can modify to change the look of Omnibar. For example, the above snippet will not include fields for the minimum and maximum listing price nor for the number of baths and beds that should be searched for. If you change extra from 0 to 1 like in the following example, it will add the “Price Max,” "Bed" and "Bath" fields that your users can make use of:
[idx-omnibar styles="1" extra="1" min_price="0"]
And changing min_price from 0 to 1 while extra is set to 1 will add a "Price Min" field for your users:
[idx-omnibar styles="1" extra="1" min_price="1"]
Here's a screenshot of how the Omnibar looks with the extra and min_price fields turned on:
The styles attribute here determines whether the default styling should be applied to the Omnibar. In most cases you’ll want to keep this set to “1” but you can set this to “0” if you or your designer is going to be adding custom CSS to change the look or layout of the Omnibar.
- Styles: when set to 1, will apply the default styling to your Omnibar. You should only set this to 0 if you are using custom CSS to completely change how the Omnibar works; if you’re unsure, keep it set to 1.
- Extra: when set to 1, include fields that allow your users to search by number of bathrooms and number of bedrooms.
- Min_price: when set to 1, include fields that allow your users to specify a minimum and maximum price.
Listing Information Shortcodes
Showcase Shortcode
The Showcase is a versatile widget that will display listings from your IDX Broker account, either from listings associated with your featured IDs on your IDX Broker account or from listings in general from your MLS. Use this widget when you want to display listings as a grid, column or row on one of your pages.
[impress_property_showcase property_type="featured" max="12" num_per_row="4" order="high-low" show_image="1"]
Adding this example shortcode to your page will pull in up to 12 of your featured listings in rows of 4 starting and is a great way to show your most valuable properties to your users.
Shortcode example for agent_id
If you have agent users setup within your IDX Broker account, you can use the agent_id attribute to only show listings associated with a specific agent. Keep in mind that here the agent_id refers to the ID you can find from your IDX Broker Dashboard by navigating to Account > Users > Agents and using the “User ID” column. Here’s a shortcode example that would show listings from an agent with a User ID of 123456:
[impress_property_showcase agent_id="123456" max="12" num_per_row="3" order="high-low" show_image="1"]
Shortcode example with a saved link
The showcase shortcode can also be configured to pull in listings from a saved link within your IDX Broker account. To do this, you just have to set the property_type attribute to “savedlinks” and add a saved_link_id attribute set to the ID number associated with your saved link. You can find the ID number for any of your saved links by navigating to Design > Website > Saved Links and looking at the “ID#” column. Here’s a shortcode example that would show listings from a saved link with ID “123”:
[impress_property_showcase property_type="savedlinks" saved_link_id="123" max="12" num_per_row="4" order="high-low" show_image="1"]
- property_type: can be set to one of “featured”, “supplemental”, “soldpending” or “savedlinks”. If you set this to “savedlinks” make sure to also set the saved_link_id
- agent_id: can be set to an agent’s User ID from the IDX Broker Dashboard to limit the listings displayed to just those associated with the agent.
- max: the maximum number of listings that this widget should display on your page.
- use_rows: add this attribute and set it to “0” if you want the listings to display in a column rather than a grid.
- num_per_row: the number of listings that should be displayed on each row of the showcase.
- order: can be set to “high-low” or “low-high” to change what order the listings should appear in.
- saved_link_id: only used when you’re looking to pull in listings from a saved link. Set it to the ID of the saved link you want to retrieve listings from.
- show_image: add and set this to “0” if you want to hide the image thumbnail that would normally be displayed for each listing
- new_window: add and set this to “1” if you want the listings to open in a new tab or window when the user clicks on a listing
Carousel shortcode
The Carousel embeds listing information in a row and behaves like a slideshow, allowing your visitors to focus on a few listings at a time. Many of the same attributes that apply to the Showcase also apply to the Carousel.
Here’s a simple shortcode example for a carousel that will automatically scroll through 12 of your featured listings, showing three at a time.
[impress_property_carousel property_type="featured" max="12" display="3" order="high-low" autoplay="1"]
- property_type: can be set to one of “featured”, “supplemental”, “soldpending” or “savedlinks”. If you set this to “savedlinks” make sure to also set the saved_link_id
- agent_id: can be set to an agent’s User ID from the IDX Broker Dashboard to limit the listings displayed to just those associated with the agent.
- max: the maximum number of listings that this widget should display on your page.
- display: the number of listings that should be displayed at one time
- order: can be set to “high-low” or “low-high” to change what order the listings should appear in.
- saved_link_id: only used when you’re looking to pull in listings from a saved link. Set it to the ID of the saved link you want to retrieve listings from.
- autoplay: add and set this to “0” if the carousel should only scroll when the user clicks on one of the arrow buttons
City Links Shortcode
The City Links shortcode will display a set of links for each city within your MLS or a list of cities you’ve already :setup within your IDX Broker account. Each city link will take the user to another page where they’ll be presented with a list of possible price ranges they can click on to see properties within their preferences. This widget can be a great way to fill up a sidebar or an otherwise empty row on your site.
[impress_city_links mls="a000" city_list="a000" use_columns="1" number_columns="4" styles="1" show_count="1" new_window="0"]
- mls: the IDX Broker MLS ID for the MLS the city links will be based on. You can find the ID for an MLS on your IDX Broker account by navigating to Design > Setting > MLS and using the “IDX ID” column.
- city_list: the ID for the city list of cities that should be used to generate the links. You can find the ID for a city list in your IDX Broker account by navigating to Design > Settings > Locations and editing an existing list. The ID will be in the url bar for your browser just after “location-lists/”
- use_columns: add and set this to “0” if you want the links generated by this widget to be organized in a single column.
- number_columns: if columns are being used, this can be set to “2”, “3”, or “4” to adjust how many columns the links will be split into.
- styles: add and set this to “0” if you’re going to be using custom CSS to adjust the layout, color or other aspects of the city links; if you’re not sure, keep it set to “1”
- show_count: add and set this to “1” if you want the number of listings found that match each city to be displayed next to each city name
- new_window: add and set this to “1” if you want each link to a city to open in a new tab or window
Lead Capture Shortcodes
Lead Sign-up Shortcode
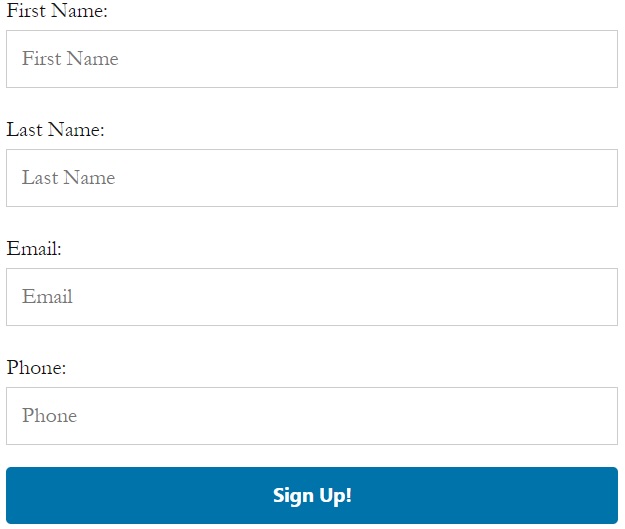
The Lead Sign-up shortcode is a platinum-only widget that inserts a simple sign-up form for your users to fill out and submit if they’re interested in receiving email updates from your IDX Broker account. They’ll also appear as a lead that you can track and manage within your account under the Leads > Manage section.
[impress_lead_signup phone="1" new_window="1" password_field="1" button_text="Sign up for updates!" styles="1"]
- button_text: the text that will appear on the button the user will click on to submit the form.
- phone: add and set this to “1” if you want to ask the user for their phone number as part of the form.
- password_field: add and set this to “1” if you want to ask the user for a password they can use to login to their lead account.
- new_window: add and set this to “1” if you want a new page or tab to open when the user submits the form.
- agent_id: can be set to an agent’s User ID from the IDX Broker Dashboard to associate any leads generated through the form with the agent
- styles: set this to “0” if you’re going to be using custom CSS to adjust the layout or other styling of the sign-up form on your page.
Lead Login Shortcode

The Lead Login shortcode is a platinum-only widget that provides a simple login form for your already registered users to sign into their lead account to manage their saved properties and saved searches.
[impress_lead_login styles="1" new_window="0" password_field="1"]
- password_field: add and set this to “1” if the user should enter a password as a part of their login
- new_window: add and set this to “1” if you want a new page or tab to open up when the login form is submitted
- styles: set this to “0” if you’re going to be using custom CSS to adjust the layout or other styling of the sign-up form on your page.